Save an audio CD to disk
Saving an audio CD (commonly called “ripping”) requires additional tools. Earlier versions of CDBurnerXP (3.x) included an integrated audio ripper, however, this feature has been removed and will never come back, since there are much better dedicated tools for this task.
If you want to burn a new audio disc from a couple of existing tracks on your audio CDs, you can add them (cda-files) to the audio layout using drag and drop, CDBurnerXP has a simple facility to temporarily store audio tracks on the hard disk to burn them.
For the following instructions, insert an audio disc into your drive as first step.
Example 1: foobar2000
Foobar2000 is a simple yet powerful audio player, which also allows you to rip audio CDs.
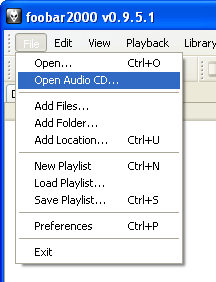
Open foobar200, go to “File” –> “Open Audio CD…”.
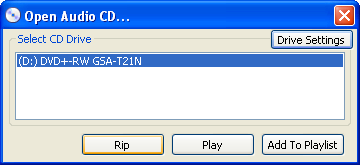
Choose the right device and select “Rip”.
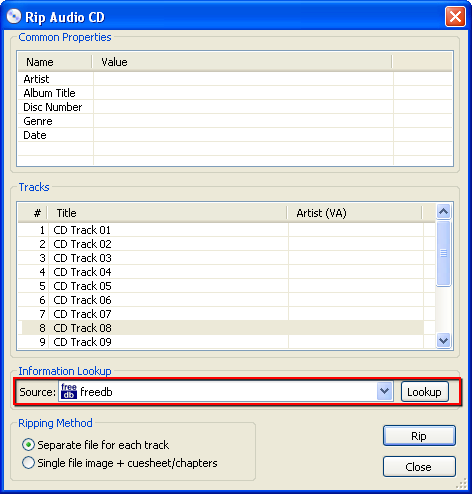
In the next window, you'll probably want to do an information lookup, however, this requires that you selected to installed the freedb-tagging tool along with foobar2000 (optional component). This will automatically give your tracks the right name, album and artist.
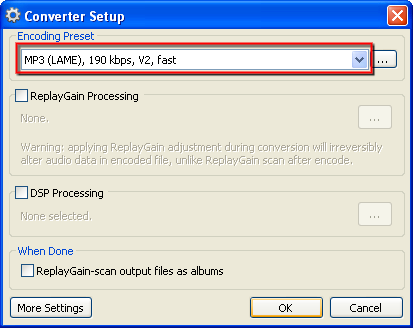
In the last step, you have to choose the audio format. I could recommend FLAC for no quality loss, or alternatively MP3 192KBit/s for a minor quality loss and a significantly smaller file size.
The first time, foobar2000 will probably ask you for the file "lame.exe" or "flac.exe". You have to download it and tell foobar2000 the location.
Example 2: CDex
CDex is dedicated to ripping audio discs. Thus, it's also rather simple to use.
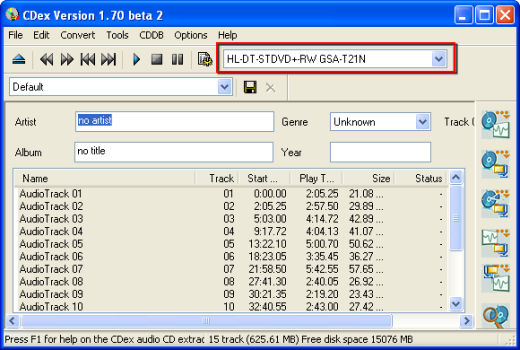
After startup, select the right drive. CDex will automatically scan the selected drive, so if you only have one, you should immediately see the disc's contents.
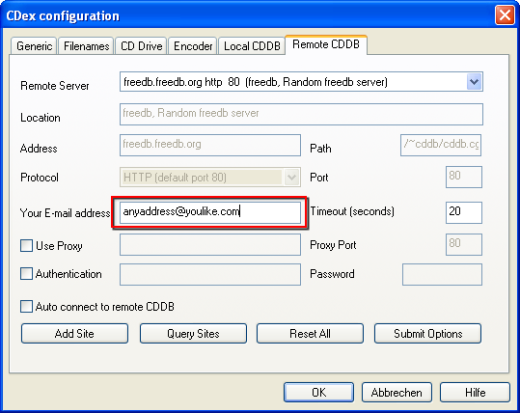
You probably want to get your files automatically tagged (equipped with title, artist and album), so go to “Options” –> “Settings” in the menu. Select the tab “Remote CDDB”, and fill in any email address.
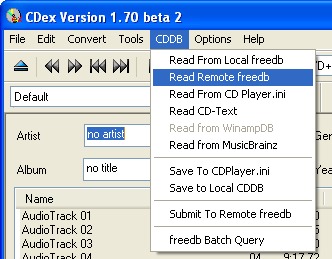
Continue with “OK”. Now go to to “CDDB” –> “Read remote freedb”.
CDex might suggest multiple albums, select the one that seems most suitable for you.
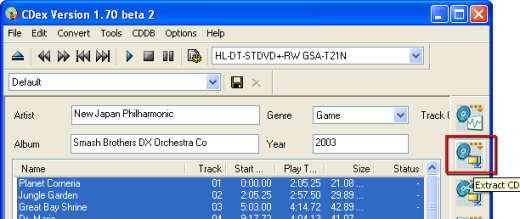
Once the information is read, make sure that all tracks you want to save are selected in the bottom list. Then hit the button as shown below.
After the process, your files will (by default) be in either “My Documents” –> “my music” or in the “my music” directory within your CDex program directory.
What now?
You can listen to your files, you can put them on a portable player, or you can create an MP3 disc or an audio disc from your files.
