Create Audio Disc
An audio CD is the type common CD players use. You can create such a disc from audio files with the extension .wav, .mp3, .ogg, .wma, .flac, .aiff, .bwf and .mp2. Check Audio Formats for further information on supported file types and below for more information on special file types.
Audio discs cannot be burned to DVD or Blu-Ray, which is by design.
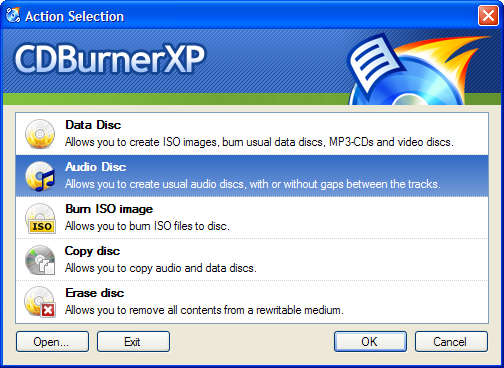
To create such a compilation select Audio Disc, from the startup screen.
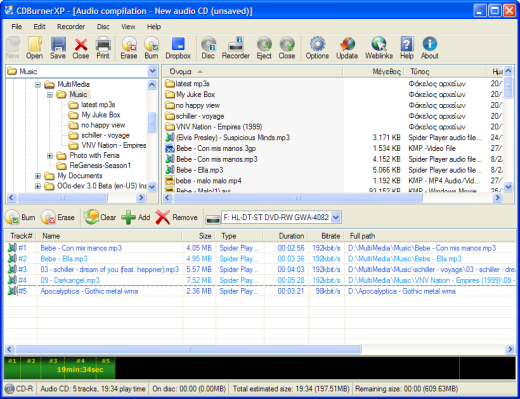
This compilation window is different from the one for data compilations, to accommodate information for the audio tracks. Note that the only structure allowed on audio discs is the order of the tracks (you cannot have folders on audio discs).
The procedure you should follow to add tracks to your audio compilation is the same as on Create Data Disc.
If you would like to listen to a track, you don't have to revert to an audio player, check Play Audio Track.
At the bottom of the window is a capacity bar, where you can check the size of the disc you create. Each track is separated from the next with a vertical line. Note that this is only an approximation, because a pause of two seconds between all tracks is assumed. The actual pause length can be set later, before starting the actual burning process.
Once you are finished click on the Burn button  . A new window will appear with a couple of options, check “Burn Options” for more information if necessary.
Track order
When you drag and drop multiple files from the Windows Explorer or internal file browser, keep in mind that the track you start dragging with will always be the first one in the track list. So if you want to maintain the correct order, always drag a selection of audio tracks at the first track of the selection. This is not a limitation of CDBurnerXP, but a limitation of Microsoft Windows.
You can change the order of tracks in the track list by either right-clicking on a track and using the “up” and “down” options, or by using drag and drop to freely move the items within the list (a black line should indicate the new position of the track). You can also use Ctrl+Up and Ctrl+Down if you feel more comfortable with the keyboard.
The column headers of the track list can be used for automatically ordering the tracks by a certain criteria. For example, you can click the “title” column to sort all tracks by their title. To disable sorting, just move one of the tracks manually to a new position.
Further information about supported files
Additional to audio file types, there are further files you can use for audio discs. There are also some limitations.
- DRM protected files
- DRM protected files are not and will never be supported. Make sure that you buy your music from shops which do not impose any usage restrictions.
- Playlists (WPL, M3U, M3U8)
- You can also create audio discs from playlists. To do so, just drag and drop the file to the compilation, and CDBurnerXP will extract the songs and add them in the right order to your audio disc. Currently M3U, M3U8 (UTF-8 encoded M3U files) and WPL (Windows Media Player) playlists are supported.
- Cue sheets
- You can add Cue sheets to audio discs, just as you can add playlists (see above). CDBurnerXP will automatically split audio files according to the information in the CUE file and add them to the compilation.
- CDA files (tracks from existing audio discs)
- You can add tracks from existing audio discs to your compilation. To do so, just drag and drop an audio track (seen as file with the extension CDA) on an existing audio disc to your compilation. CDBurnerXP will then extract and add the audio track (may take a short while). Note that you cannot copy CDA files itself to your hard disc, as these only contain information on the location of the track, and not any audio data.
- 99 track limit
- You can add at maximum 99 tracks to an audio disc. This is a limitation of the audio CD specification.
- Mixed mode discs
- If you would like to create a disc containing both Audio and Data you should follow the procedure described in the Mixed mode disc part of the help file.
Track title and artist information
You can add information about the artist and title name to audio discs. For technical reasons, this information can only be included if you burn audio discs using the “Disc at Once” mode, that is, without additional pauses/gaps between the audio tracks.
CDBurnerXP will try its best to automatically extract the artist and title information from the audio files you add to your compilation by reading for example the ID3 tags of MP3 files. If your files are not properly tagged or do not contain any information at all, you can manually enter the information in CDBurnerXP. To do so, click Disc –> CD-Text in the menu.
It is not possible to add the ID3 tags themselves to an audio disc, because all audio data will be “converted” to a special file format which only contains audio data.
Version requirement
This article applies to version 4.0.027 or higher.
In older versions of CDBurnerXP the selections are somewhat different, since it has been redesigned.

