KB10: Burn photos using Picasa and CDBurnerXP
Picasa is an easy to use application made by Google, which allows you to organise and edit your photos.
Why the need for CDBurnerXP? Picasa does in fact come with an integrated burning feature, but I find it rather cumbersome to use.
What you need
Obviously, you need to install Picasa first. Also, you will need CDBurnerXP 4.0.027 or higher. After that, you can install a simple CDBurnerXP button.
How to use
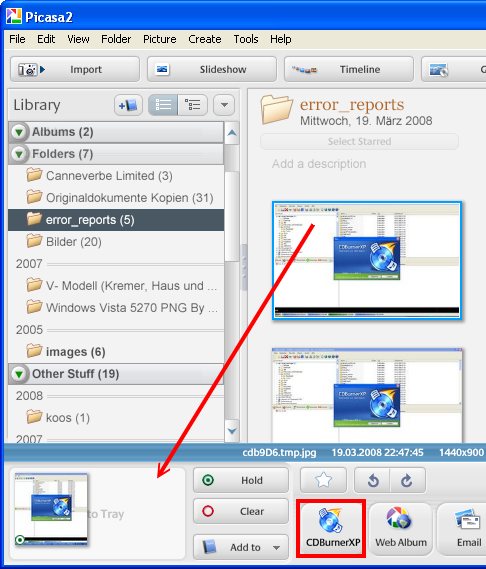
Once installed, it's rather simple to use (that's the point of it). Simply drag and drop all pictures you want to be burned to the tray (bottom left) and then press the CDBurnerXP button. This will automatically launch CDBurnerXP (might take a moment), start a new data compilation and add your pictures to it. Then you can proceed as you wish (create an ISO, burn a disc, etc.).
How to uninstall
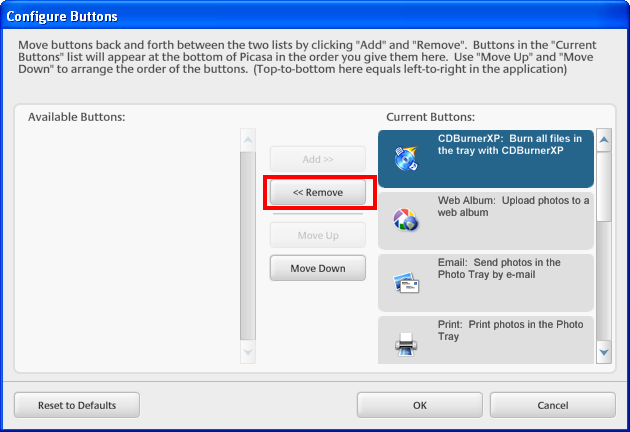
If you want to simply disable the button, rightclick in the button bar area and choose (well, you don't have much of a choice actually) “Configure Buttons…”.
In the next dialog, select the CDBurnerXP button, click remove and then OK.
You can also completely remove the button from your system. To do that, go to the folder %USERPROFILE%\Local Settings\Application data\Google\Picasa2\buttons (enter this in Start→Run for example) and remove the file CDBurnerXPExport.pbz.
Version requirement
This article applies to version 4.0.027 or higher.


